> ## Documentation Index
> Fetch the complete documentation index at: https://docs.signupbreeze.com/llms.txt
> Use this file to discover all available pages before exploring further.
# Quickstart
> Create your first event in under 5 minutes.
This guide walks you through creating an account, setting up your first event, and sharing it with volunteers.
## Step 1: Create your account
Go to [signupbreeze.com](https://signupbreeze.com) and sign up. You can register with your email or use Google or Apple sign-in.
After verifying your email, you'll land on your dashboard.
## Step 2: Create an event
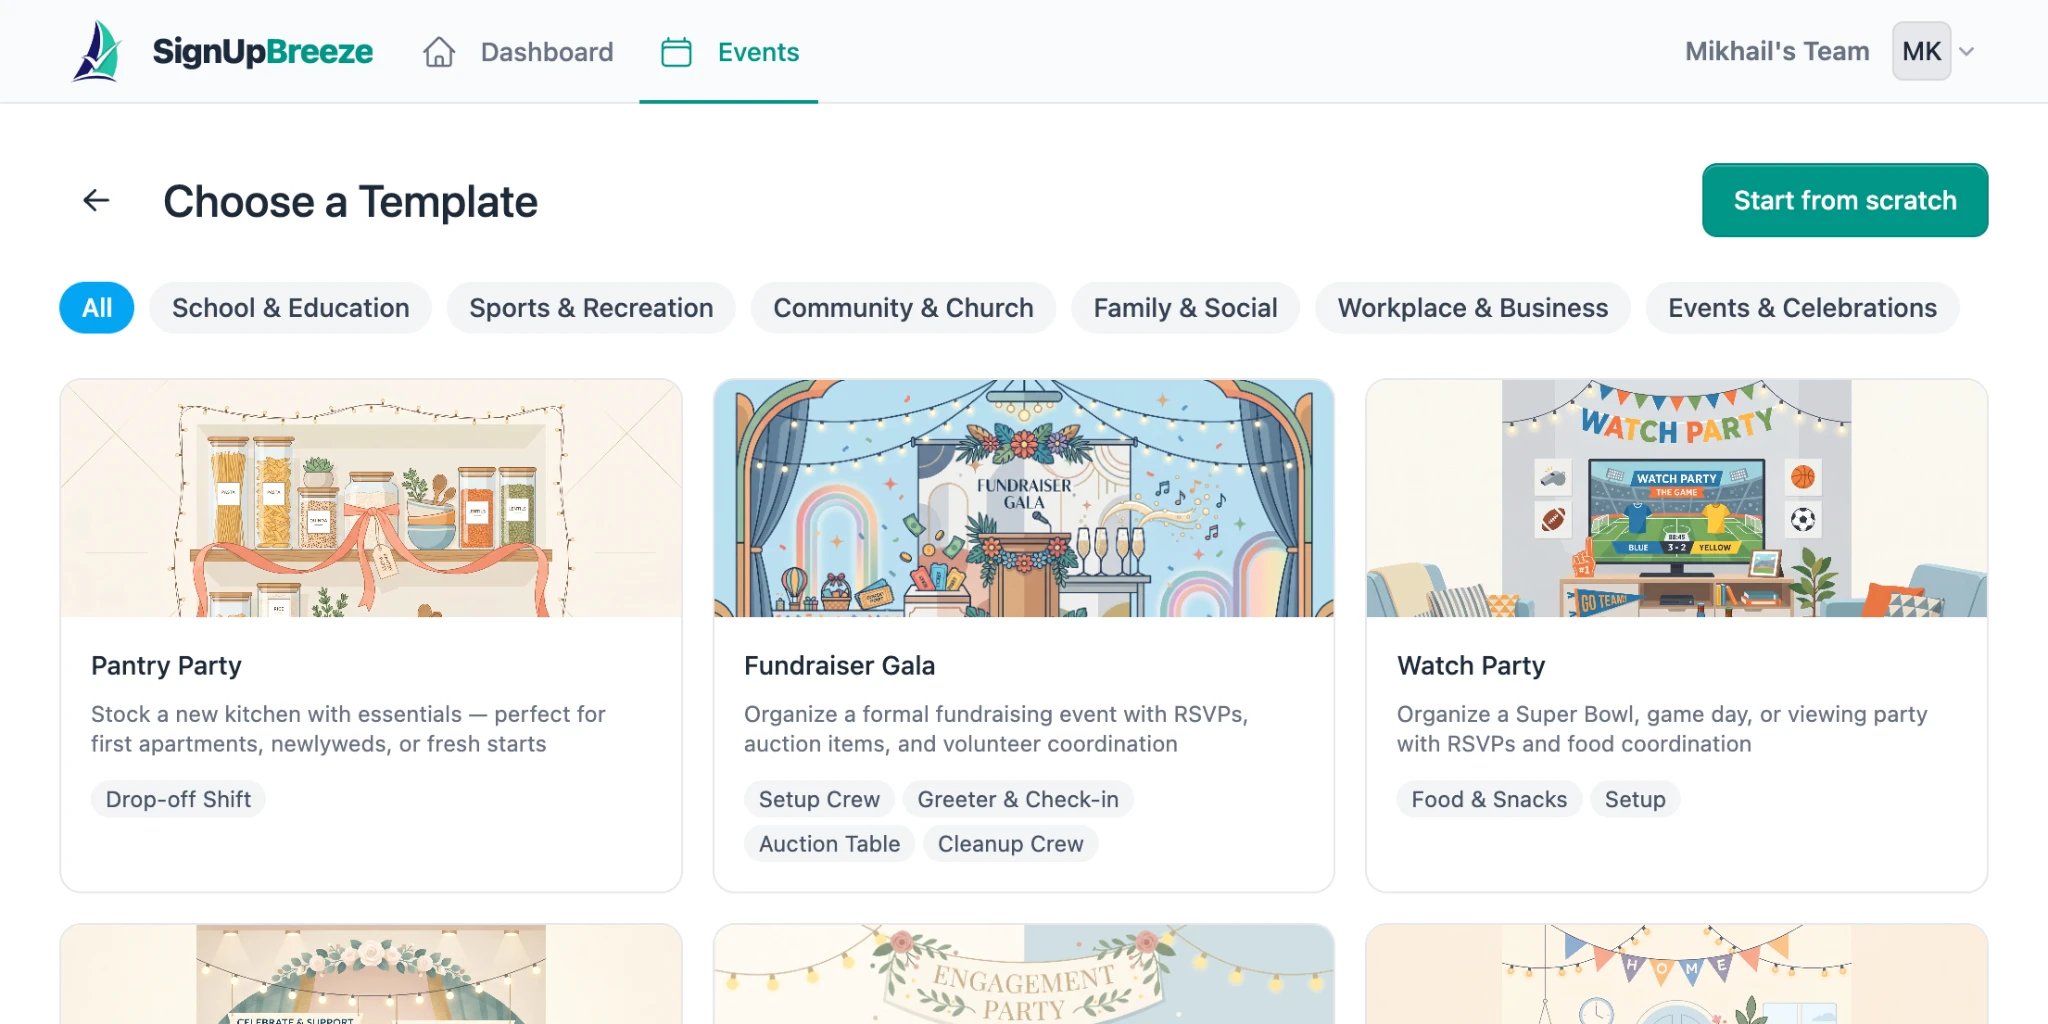
From your dashboard, click **Create Event**. Select from a predefined template to get started quickly, or click **Start from scratch** to build your event from a blank slate.
 Fill in the basics:
* **Title** — what you're organizing (e.g., "Spring Bake Sale")
* **Description** — details volunteers need to know
* **Location** — where it's happening
* **Date and time** — when it starts and ends
## Step 3: Add shifts
If you selected a template, shifts are added automatically based on the template's structure — you can adjust them as needed. If you started from scratch, you'll need to add shifts manually. Each shift needs a date, start time, end time, and the number of volunteer spots available.
You can add as many shifts as you need — morning and afternoon slots, different days, different roles.
## Step 4: Publish and share your event
Before you can share your event, enable the **Publish immediately** toggle on the event page. Once published, your event gets a unique public URL and a QR code.
Fill in the basics:
* **Title** — what you're organizing (e.g., "Spring Bake Sale")
* **Description** — details volunteers need to know
* **Location** — where it's happening
* **Date and time** — when it starts and ends
## Step 3: Add shifts
If you selected a template, shifts are added automatically based on the template's structure — you can adjust them as needed. If you started from scratch, you'll need to add shifts manually. Each shift needs a date, start time, end time, and the number of volunteer spots available.
You can add as many shifts as you need — morning and afternoon slots, different days, different roles.
## Step 4: Publish and share your event
Before you can share your event, enable the **Publish immediately** toggle on the event page. Once published, your event gets a unique public URL and a QR code.
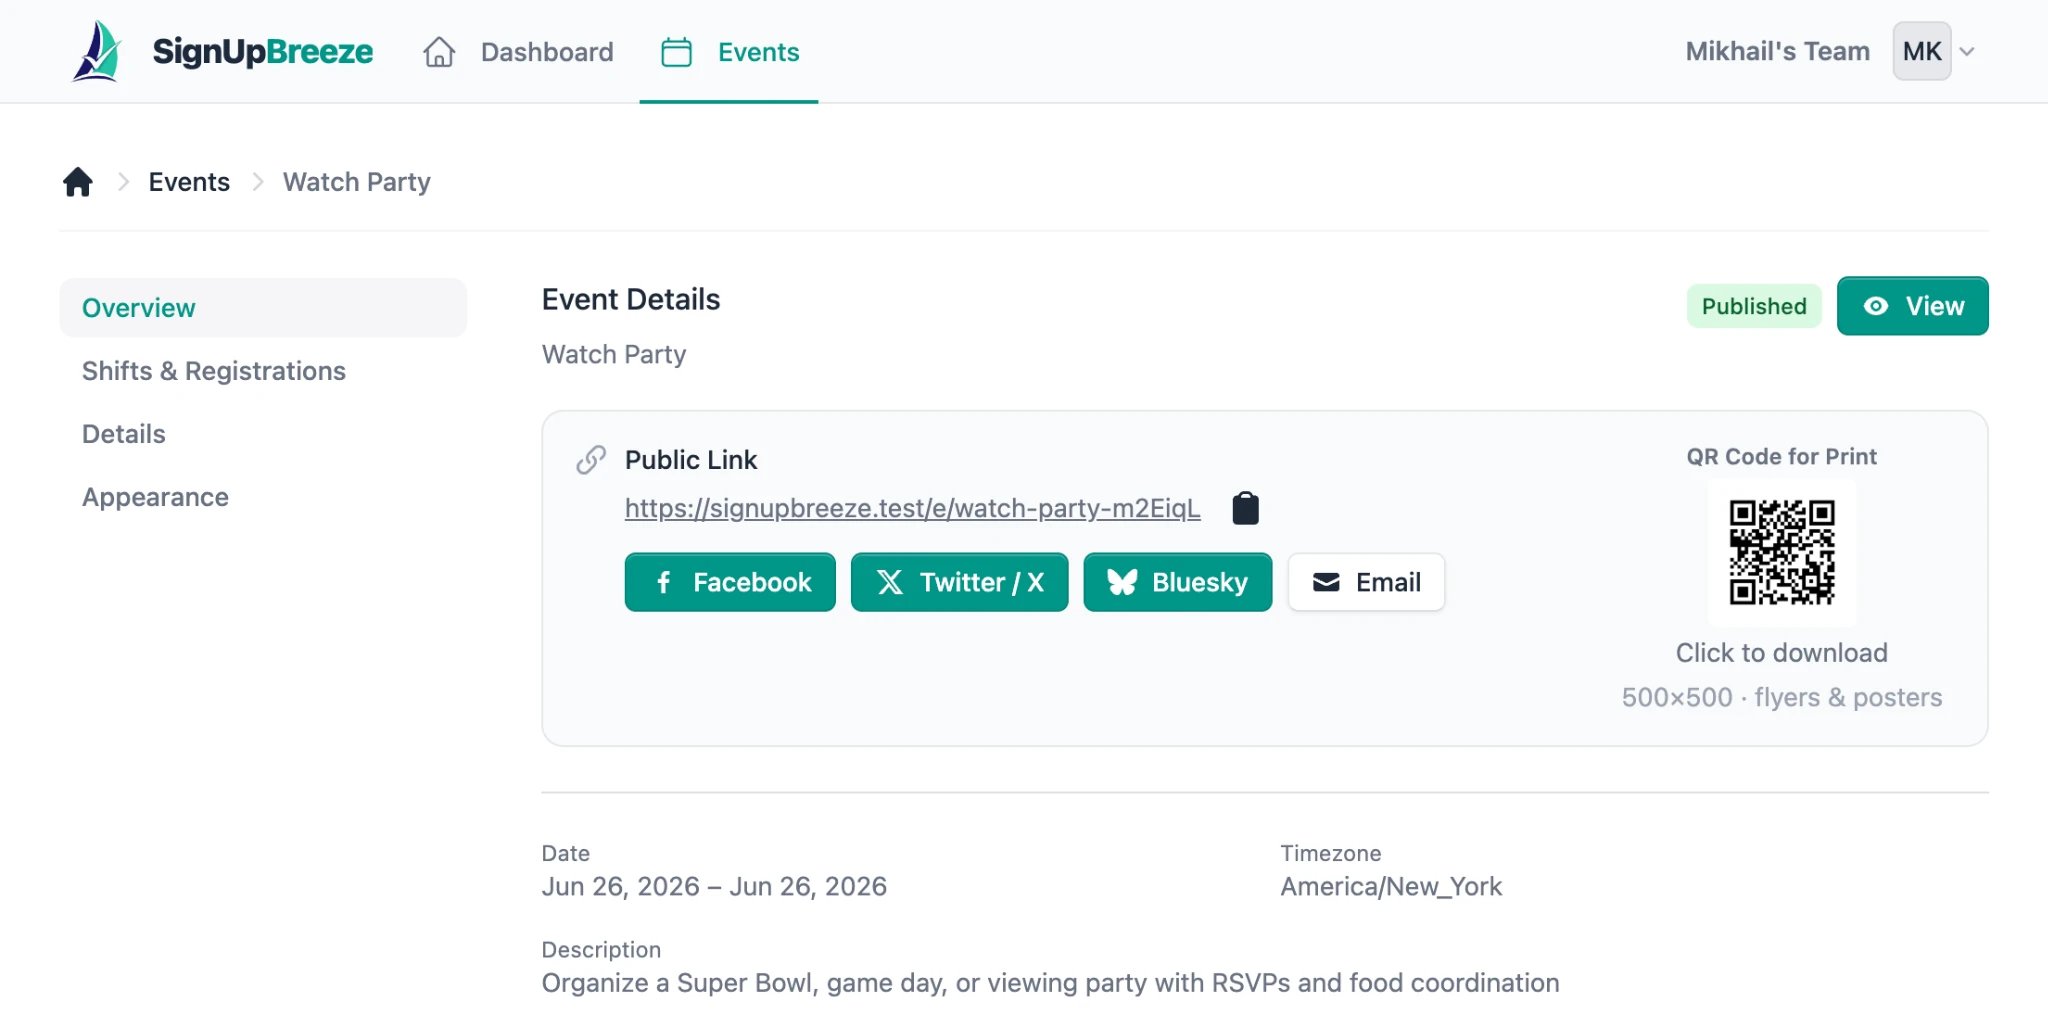 Share the link via email, text, social media, or print the QR code on a flyer. Volunteers visit the page, pick a shift, enter their name and email, and they're signed up. No account needed on their end.
## Step 5: Manage signups
As volunteers register, navigate to your event and select the **Shifts & Registrations** tab. From there you can view who signed up for each shift and manage registrations as needed.
That's it — you're up and running.
Share the link via email, text, social media, or print the QR code on a flyer. Volunteers visit the page, pick a shift, enter their name and email, and they're signed up. No account needed on their end.
## Step 5: Manage signups
As volunteers register, navigate to your event and select the **Shifts & Registrations** tab. From there you can view who signed up for each shift and manage registrations as needed.
That's it — you're up and running.